How to install TestNG with selenium:
- Open the eclipse IDE
- On help tab click on "Install new software". (Refer Fig 1.1)
- On "Install" popup click on "Add" button against work with field. (Ref Fig 1.2)
- Specify the Name. (Ref Fig 1.2)
- Provide the following URL "http://beust.com/eclipse/" (You could find which URL to be used in the following URL "http://testng.org/doc/download.html"). (Ref Fig 1.2)
- Latest version of TestNG plug-in information will be found below "Work with" field
- Select the check box against the plug-in. (Ref Fig 1.3)
- Click on "Next" button. (Ref Fig 1.3)
- Choose the name and click on "Next" button. (Ref Fig 1.4)
- Choose the "I accept the terms of the license agreement" radio button. (Ref Fig 1.5)
- Click on "Finish" button. (Ref Fig 1.5)
- Once TestNg installed it will ask you to restart the Eclipse IDE.
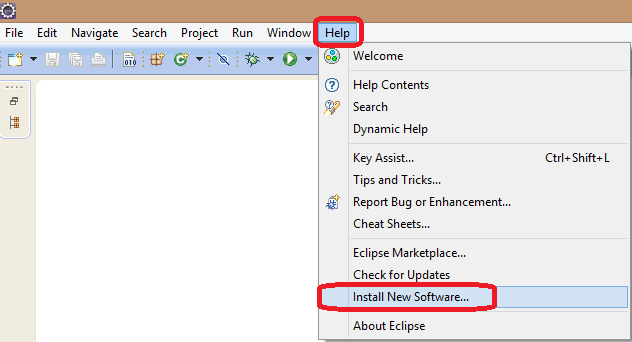
Fig 1.1

Fig 1.2

Fig 1.3

Fig 1.4

Fig 1.5
Thank you buddies.
No comments:
Post a Comment